

Building on my previous discussion about Accounts Receivable and Accounts Payable’s Settlement Parameters, this post delves into the Settle Remainder function. This feature streamlines the process of writing off or transferring customer or vendor balances by automating the creation of journal entries, eliminating the need to manually create journal entries for the write-offs or balance transfers.
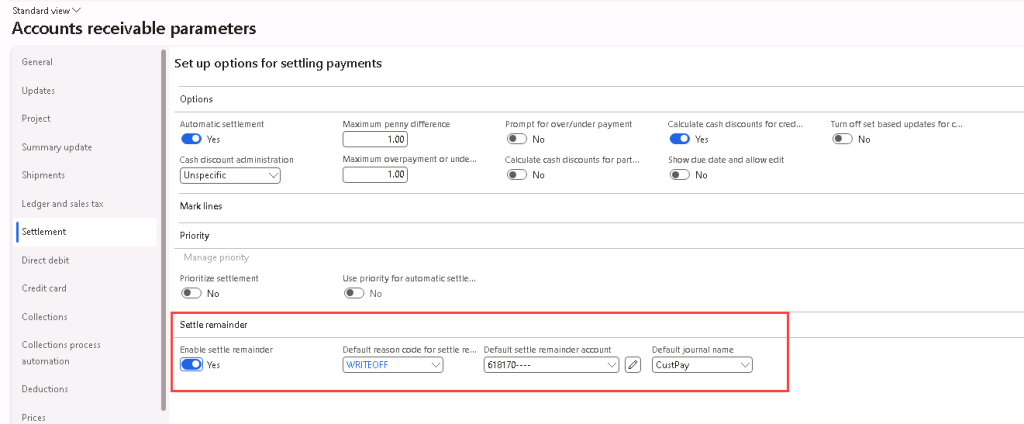
To enable the Settle remainder function, navigate to Accounts receivable > Setup > Accounts receivable parameters, under the Settlement tab’s Settle remainder section, select “Yes” for “Enable settle remainder“.
Select the “Default reason code for settle remainder” and the “Default settle remainder account” should automatically populate based on the Customer write-off reason codes setup (Accounts receivable > Setup > Customer write-off reason codes). Update the account string as needed. Then, select the “Default journal name” for the journal to be created when settle remainder function is being used. The available journals are the ones set up as Customer payment journals in the legal entity.
The Settle remainder function can be triggered from the Settle transactions form in a few locations:
- Via the Customer Payment Journal
- Via the Customer Transactions list. On the ribbon of the Customer record, select Customer > Transactions > Transactions > Settlement > Settle transactions
- Via the Open customer invoices list. On the ribbon, select Invoice > Settle > Settle open transactions
- Via the Customer invoices past due list. On the ribbon, select Invoice > Settle > Settle open transactions
Settle Remainder via Customer Payment Journal
Doing via Customer Payment Journal might be convenient if you are entering the customer’s partial payment and plan to write-off or transfer the balance to another customer together at once.
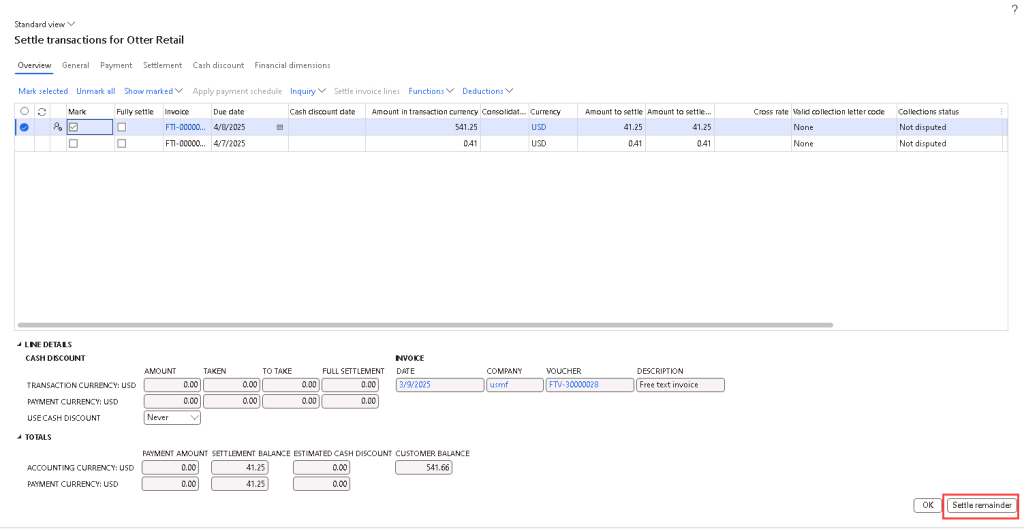
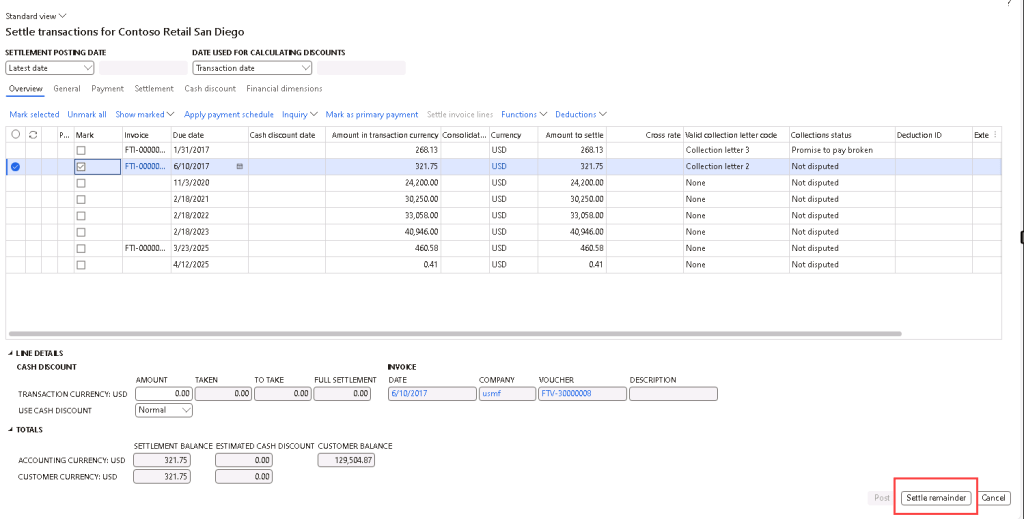
After entering the customer payment, create another journal line for the customer and select “Settle transactions”. Choose the lines that should have the remainder settled, and click “Settle remainder”.
You may select to transfer the balance to another customer or leave it blank and click “Settle remainder” again.
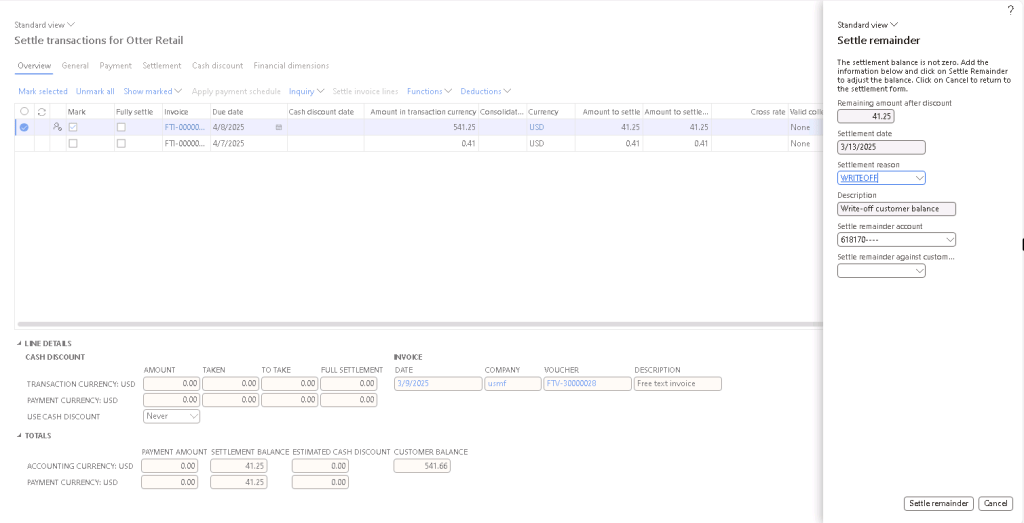
This creates a new line on the Customer Payment Journal that offsets against the Ledger account that was defined in the AR parameters.

After the Customer Payment Journal is posted, you can see that the $41.25 is posted to the account that was defined in the AR parameters with a default Description of “Settle remainder – Write-off customer balance”.



If you had chosen to settle remainder against another customer, then 2 journal lines will be created to transfer the balance to the other customer. The Settle remainder ledger account will merely serve as a passthrough account in this circumstance.
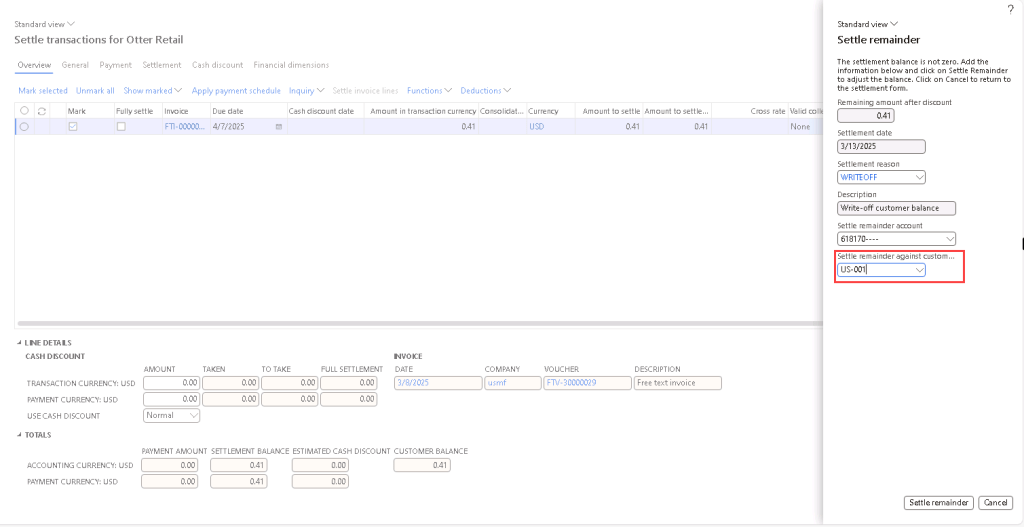



Settle Remainder via Settle Transactions form not from the Customer Payment Journal screen
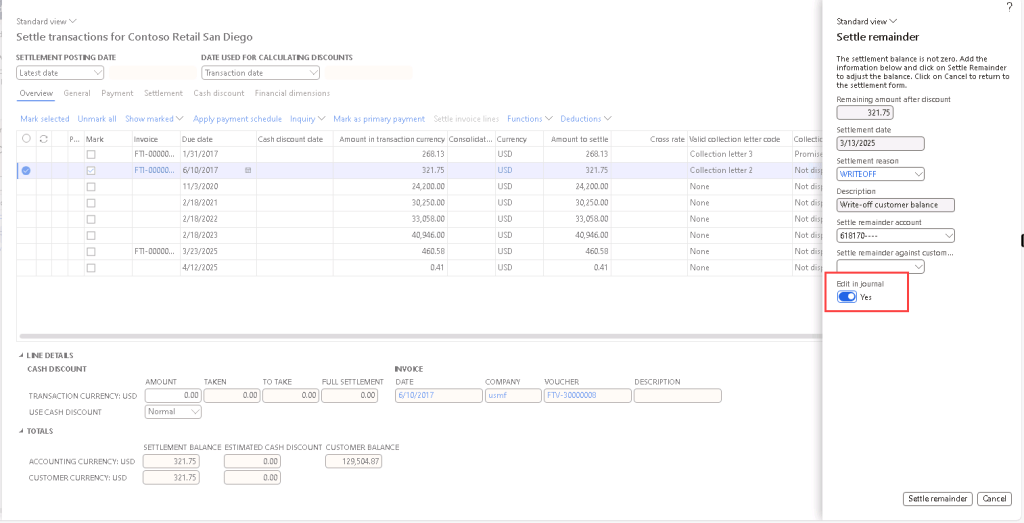
If you are not using the Settle Remainder function from the Customer Payment Journal screen, upon clicking “Settle remainder”, there is an additional option on the form to “Edit in journal“.
If you select “No” for “Edit in journal“, the journal will be created and posted automatically if there are no workflows attached to the journal name.
If you select “Yes” for “Edit in journal“, after clicking on “Settle remainder”, it will open the Customer Payment Journal page so you can review and edit the journal as needed, and post the journal manually. If you have workflow attached to the journal name, you may also submit the journal for workflow approval. The postings results are the same regardless of doing it via the Customer Payment Journal or not.




 D365 Deep Dive
Leave a comment