

Month-end and year-end closes are among the busiest periods for any Accounting department. One critical task during this process is posting adjustments to correct errors, allocate expenses, and reconcile accounts after the initial posting period has ended. By leveraging Dynamics 365 Finance’s “Closing Period Adjustments” functionality, Accounting teams can efficiently manage accruals, deferrals, and other end-of-period entries while maintaining data integrity.
Common examples of closing period adjustments include:
- Accruals for expenses incurred but not yet invoiced, such as utilities or professional fees.
- Deferrals to recognize prepaid expenses or revenues over future periods.
- Intercompany corrections to align transactions between related entities.
- Reclassification entries to move amounts between accounts for accurate presentation.
Effectively managing these adjustments is essential for a smooth month-end or year-end close and for ensuring transparency across multi-entity operations.
In D365, the “Closing Period Adjustments” feature is primarily designed for posting fiscal year-end adjustments in Period 13 (Closing Period) on the ledger calendar, ensuring that these closing transactions are kept separate from regular operating transactions. However, this functionality can also be utilized for month-end close processes if necessary.
To adjust for Year End Close
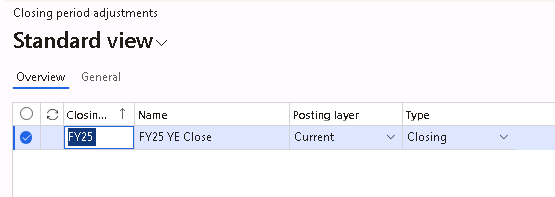
To access the “Closing Period Adjustments” form, navigate to General Ledger > Period Close > Closing Period Adjustments.
On the “Closing Period Adjustments” form, enter the Closing Sheet Identifier and Name. The Type will automatically be populated with “Closing”.
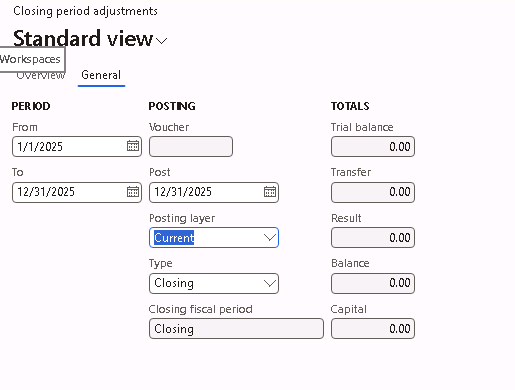
Under the “General” tab, enter the Period and the Post dates. Then, click “Save”.
- The From and To Period dates are to define what period the balances should be loaded for.
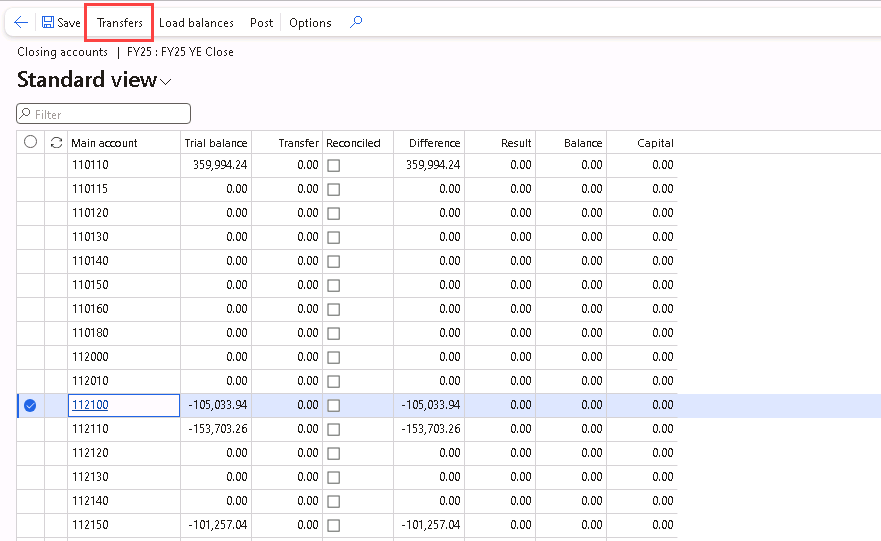
Select “Closing accounts” on the ribbon, then click “Load balances”.
Select “No” for “Delete existing accounts”, otherwise it will reload the balances and overwrite any adjustments that you have entered previously.

The balances loaded will show all the main accounts even if they have $0 balance.
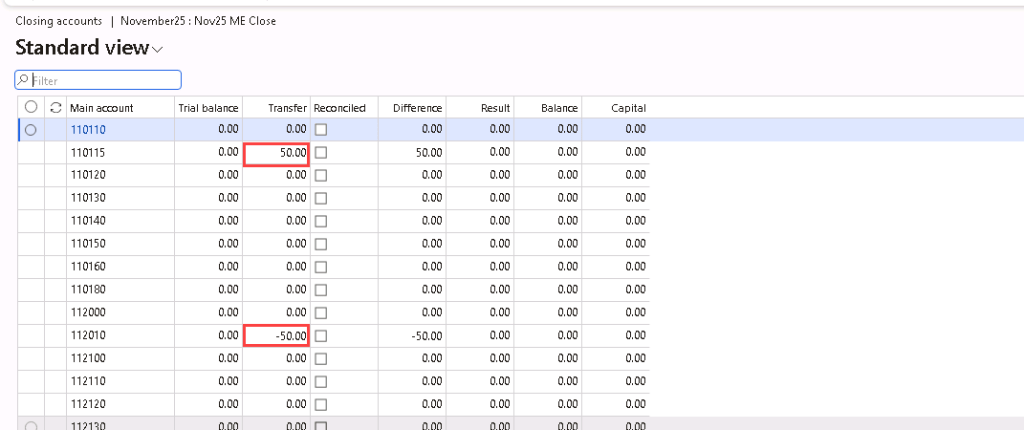
Select the Main account that you would like to adjust and click “Transfers”.
Enter a Description as needed and select the Offset account and Amount. Then click “Save”.

Navigate back to the Closing accounts form, the $150 adjustment now shows up on the Transfer column in both accounts. The new ending balances are also updated on the Difference column.

When all the adjustments have been entered, click on “Post”.
Navigate back to the “Period Close Adjustments” form, and click on “Voucher” to review the voucher posted. Note that the Posting type = “Close” and Type = “Closing”.

Navigate to the Trial Balance (General ledger > Inquiries and reports > Trial balance), and run the TB for FY2025. However, the amount we have just adjusted is not showing up on the TB and the Closing balance does not match what we saw earlier on the Difference column.
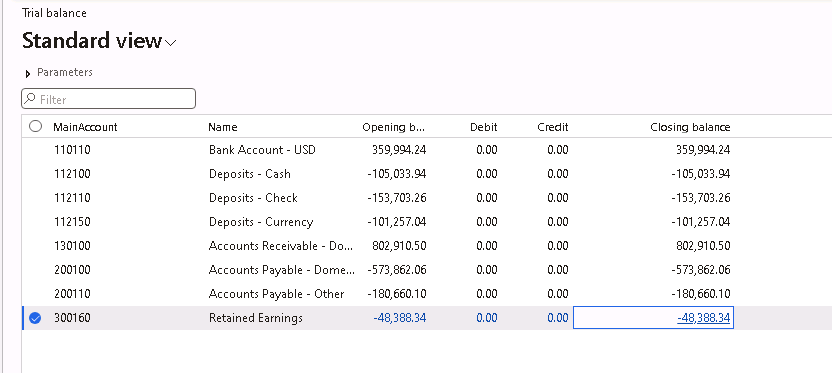
To show the closing period adjustment amount, click on “Columns to display” and select “Include closing period adjustments in balances”. Update the form and it should now show the closing period adjustments amount and the Closing balance would be updated to include the adjustments.

To adjust for Month End Close
The procedures for adjusting for month end close are pretty similar with adjusting for year end close.
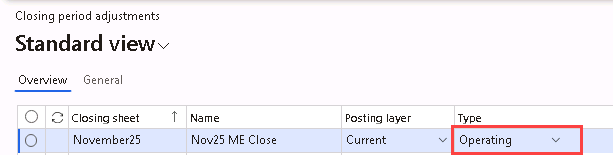
Enter the Closing sheet Identifier and Name, but change the Type to “Operating”.
- If the Post date entered is not a Closing period (ie. 12/31/2025), the Type cannot be kept as Closing. An error message will appear.
- If the Post date entered is a Closing period (ie. 12/31/2025), changing the Type to “Operating” will not make a difference in how the vouchers are being posted. It will still post as if it is a Year End Closing Adjustment.
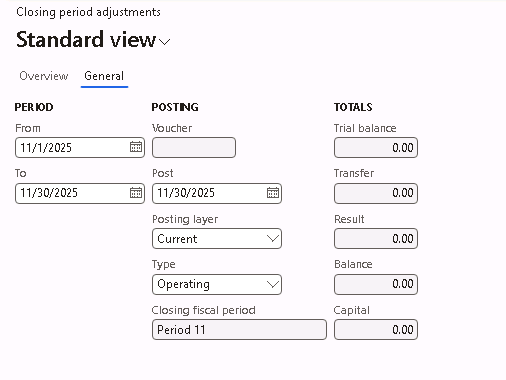
Update the Period and Post dates.
Then, load the balances for the period and enter the adjustments as needed, and post the adjustments.
The voucher posted still has a Posting type of “Close” but the Type is “Operating”.

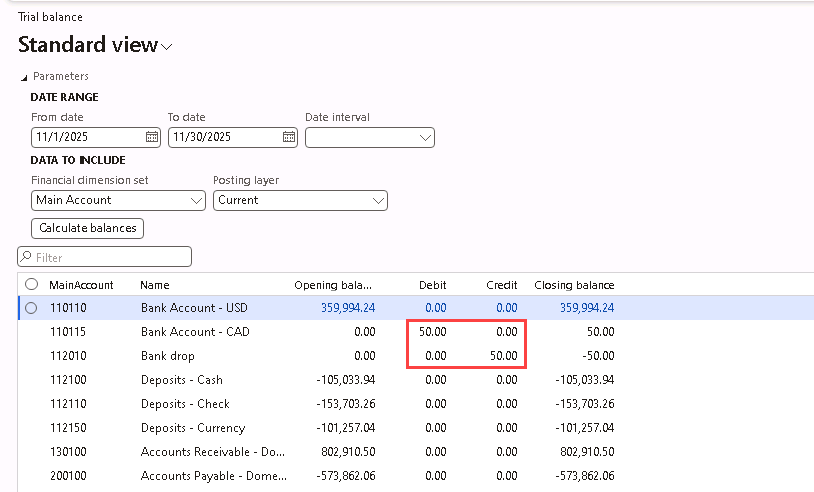
Navigate to the Trial balance, and without including the closing period adjustments in balances, I could see the amount that was adjusted.
Pros and Cons
The Closing Period Adjustment functionality is an optional activity in D365 and it does come with a few pros and cons.
Pros:
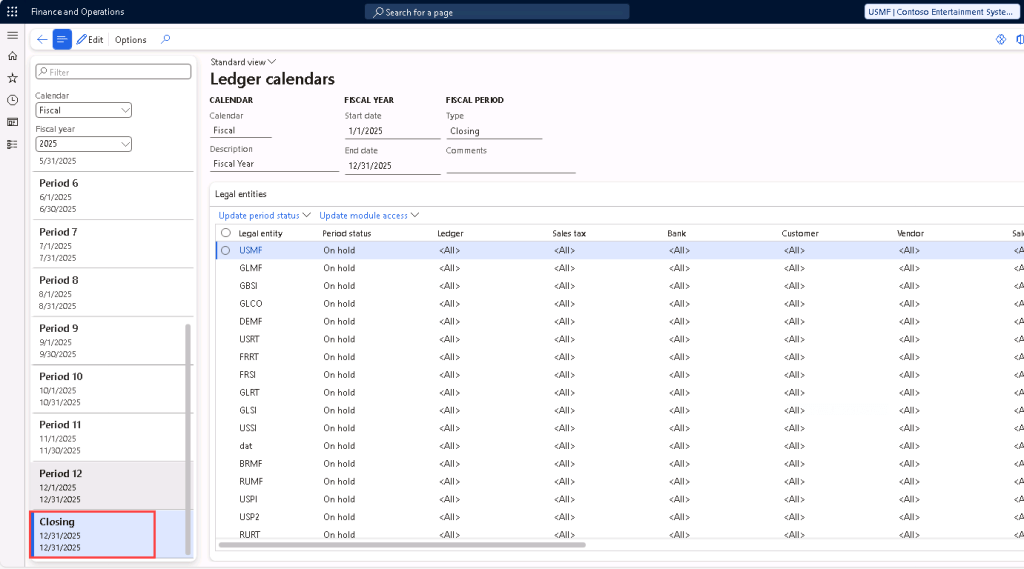
- Accounting department can have the ledger calendar for the Fiscal Year’s months set to “On hold” and leave Period 13 “Open” to make the adjustment entries for Fiscal Year Close.
- Closing transactions can be easily distinguished from regular operating transactions on the voucher’s “Posting type” and “Type”.
- Accountants can review the balances on the Closing Period Adjustment form’s “Difference” column before committing and posting the entries.
Cons:
- Accountants have to enter the transfers/adjustments one-by-one on the Closing Period Adjustment form.
- Financial reports might need to be updated to include the closing period adjustments amounts.


Leave a comment