
It is a common scenario where you place an order and when the vendor ships the order, they often send the invoice at the same time. However, since you haven’t received the order yet, you can’t enter the Product Receipt. This leaves you with an outstanding invoice. Typically, the Accounts Payable (AP) clerk might set the invoice aside until the product arrives, then enter it into D365 Finance, but this approach can lead to misplaced invoices or missed payment deadlines. Alternatively, the AP clerk could manually enter an AP Invoice Journal in D365 Finance to recognize the liability, then reverse it once the product is received and invoice the Purchase Order (PO). This method, however, increases manual workload and the risk of double invoicing if the clerk forgets to reverse the temporary invoice entered earlier.
To address these issues, D365 Finance has an Invoice Register function. This feature allows users to enter the received invoice, and once approved, it posts to a temporary in-transit account and remains in the Invoice Pool until the PO is received and ready for invoicing.
The invoice register function has 3 major steps with the following accounting implications:
- Create and confirm a PO
No accounting implications
- Create and post an invoice register journal
Debit Offset account
Credit Arrival account
- Receive the PO
Debit Inventory (Cost or purchased materials received)
Credit Goods Received Not Invoice (Purchase, accrual)
- Convert the unapproved invoice on Invoice Pool into a PO Pending Invoice and post the PO Pending Invoice
Reverse Step 2 Posting:
Debit Arrival account
Credit Offset account
Reverse Step 3 Posting:
Debit GRNI (Purchase, accrual)
Credit Inventory (Cost or purchased materials received)
Debit Inventory/Expense (Cost of purchased materials invoiced)
Credit Vendor Summary
Complete the necessary setups
Navigate to Accounts payable > Setup > Vendor posting profiles and ensure that the “Arrival” and “Offset account” field is populated with a main account. These accounts will be used for posting invoice registers.
Arrival account will be the temporary AP liability account and when the final invoice is approved/posted, the debt is transferred from the Arrival account to the Summary account.
Offset account will be the temporary expense account for vendor purchases that have not yet been approved

You may also set up a Vendor invoice register journal workflow if desired by navigating to Accounts payable > Setup > Accounts payable workflows.

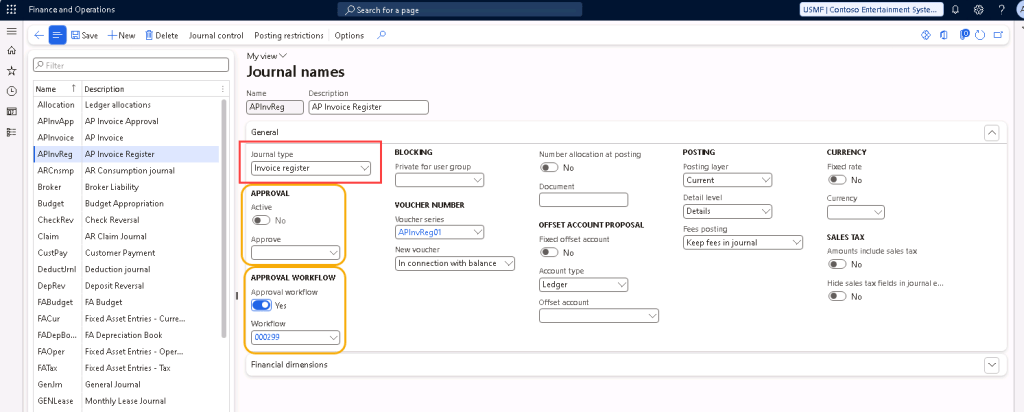
Navigate to General ledger > Journal setup > Journal names and create a journal name for the Invoice Register journal. Make sure the Journal type = “Invoice register”.
If you’ve created a vendor invoice register journal workflow in the previous step, you may select “Yes” on Approval workflow and select the workflow to be used.
Alternatively, you could also use a simple approval step without involving the workflows but choosing the Approver person on the journal name and selecting “Yes” on the Active button under Approval section.
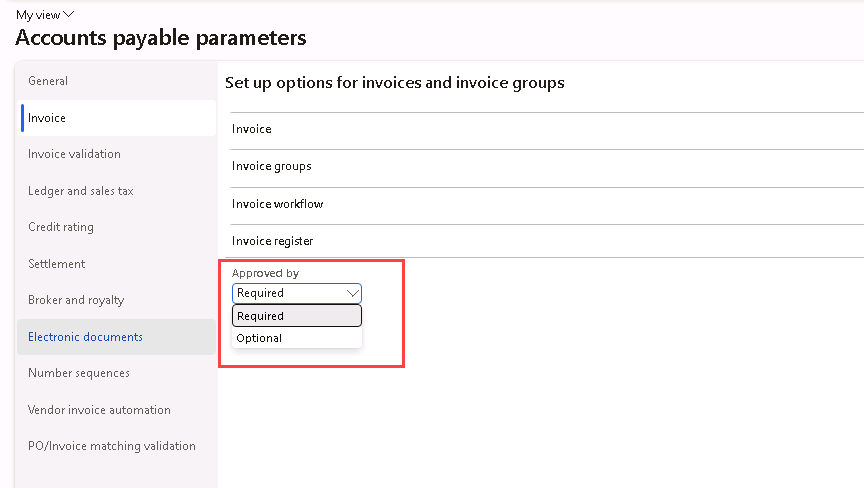
In Version 10.0.37, D365 Finance introduced a Vendor Invoice Register Approved Feature to determine whether an approver is required in the vendor invoice register while posting. If you would like the ability to control this parameter, you may enable it under Feature management and a new section will appear under the Accounts payable parameters > Invoice tab > Invoice register, where you can select if the “Approved by” field is required.
Required – The Approved by field must be set before the invoice register journal can be posted.
Optional – The invoice register journal can be posted without approval.

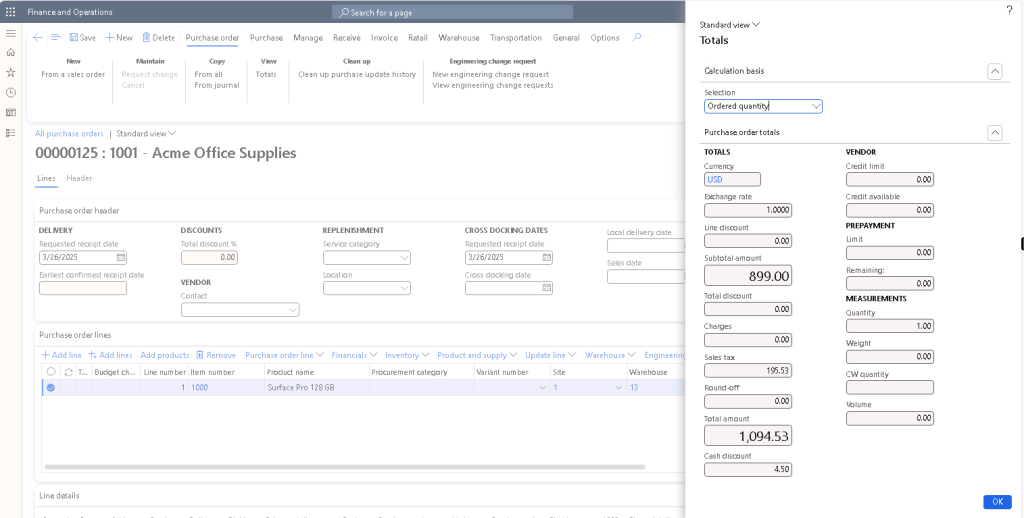
Step 1: Create and Confirm a Purchase Order
Navigate to Accounts payable > Orders > All purchase orders and create a PO with total $1,094.53 including tax ($899 is the item subtotal amount). Then, confirm the PO and at this point the PO is usually submitted to the vendor to process the order. No accounting postings are being generated at this point.
Step 2: Create and Post an Invoice Register Journal
Once the vendor processed the order and shipped the items, the vendor also sends an invoice to you. However, before receiving the PO, you could not post the invoice and recognize the liability for this PO yet.
To create an invoice register journal, navigate to Accounts Payable > Invoices > Invoice register. Click “+New” to create a new invoice register journal, and click Lines. Since the setup of this Journal Name for the Invoice Register does not have “Amounts include sales tax” checked as “Yes”, the Subtotal amount of the invoice will be entered on the credit field and upon updating the sales tax group and item sales tax group as needed, the sales tax amount will be calculated. Verify the sales tax amount calculated and total amount matches the invoice received.
Depending on your AP parameters’ selection if the “Approved by” field is required, you may have to select an Approver on the “Approved by” field.

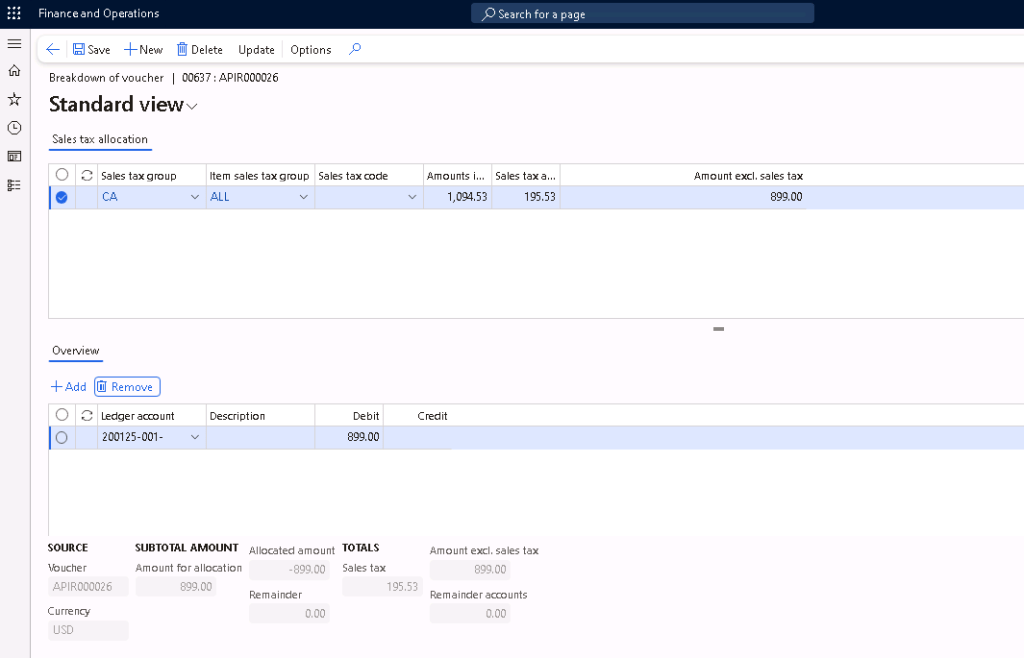
By default, the subtotal amount and the taxes will all be posted to the “Offset” account as setup on the Vendor posting profile, but it can be updated as needed. To update, click on “Breakdown of voucher” on the vendor invoice register journal and update the Ledger account, then click Update, a new offset line with the updated ledger account information will be added to the vendor invoice register journal.

If the Invoice Register is attached to an approval or workflow, submit the invoice register to be approved. Once the Invoice Register Journal is approved, it can be posted.
Vouchers posted:

After posting the invoice register journal, the vendor invoice will show up on Accounts payable > Invoices > Invoice pool, as well as under the vendor transactions and Invoice journal lists. However, note that this invoice will not be available for payment until the PO’s pending vendor invoice is posted.


Step 3: Receive the Purchase Order
When the items arrive, receive the PO as usual.
Vouchers posted:

Step 4: Post the final PO invoice
Navigate to Accounts Payable > Invoices > Invoice pool, click on “Purchase order” to generate the pending vendor invoice from the invoice pool using the same Invoice number as entered on the Invoice Register.

You can match and update the vendor invoice as needed.
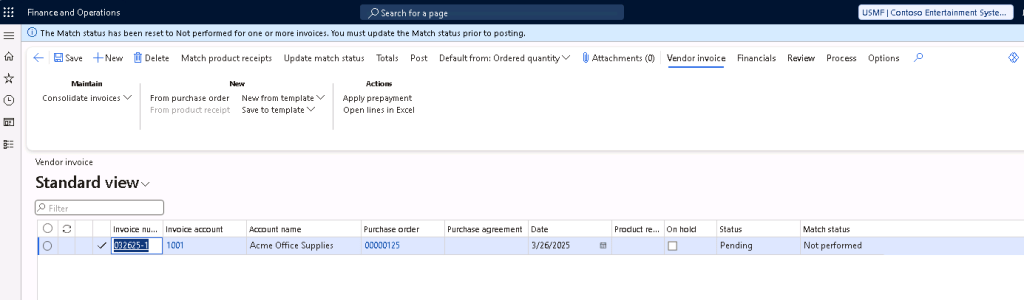
Then, post the pending vendor invoice.
The pending vendor invoice will share the same voucher number as the invoice register and will reverse out the transactions posted from invoice register and product receipt, and post it to the inventory/expense accounts, vendor account (as setup on the “Summary account” on Vendor posting profile), and sales tax accounts.


Leave a comment