

There are times when both the customer and the vendor are the same party in a company. Before “Customer and Vendor Balance Netting” feature was introduced, D365 Finance users will have to manually create dummy payment journals to clear the invoices balances. With the “Customer and Vendor Balance Netting” feature being introduced in Version 10.0.40, users can easily consolidate the company’s customer and vendor balances and save on unnecessary transaction fees and reconciliation efforts.
It is also worth noting that the customer and vendor balance netting function can also be used in intercompany settings when the customers and vendors are in different legal entities.
To utilize this feature, enable the feature “Customer and Vendor Balance Netting”
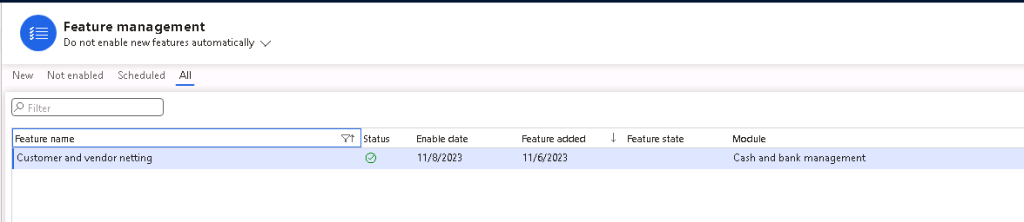
After enabling the feature, new menu items will appear under the Cash and Bank management module, Accounts payable module, and Accounts receivable module. These 3 modules all have the same menu items for Netting functionality. For consistency, this article will mostly navigate to the Netting features via Cash and bank management module.

Customer and Vendor Balance Netting in the Same Legal Entity
- Setup a Journal Name (General ledger > Journal setup > Journal names) with Journal type = Customer and vendor netting.

- If a separate Main Account needs to be used for Balance Netting, create a new Main Account.
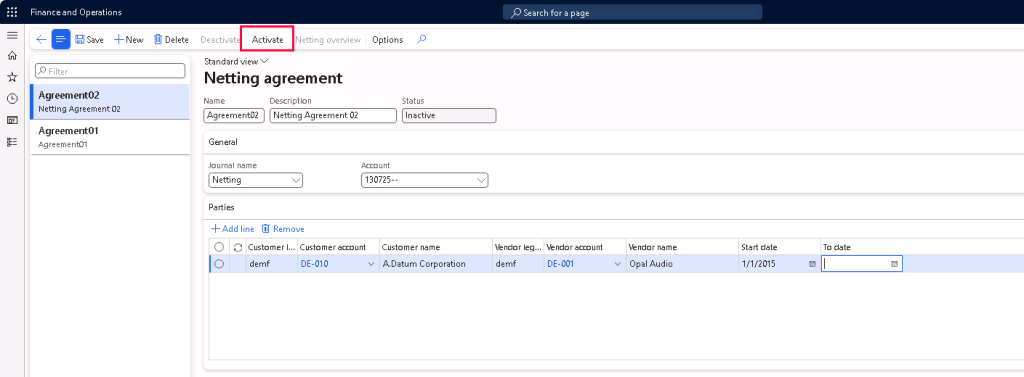
- Setup Netting Agreement (Cash and Bank Management > Netting > Netting agreements)
- Enter the details for the Netting agreement Name and Description
- Select the Journal Name created in Step 1 above and enter the Main Account to be used or created in Step 2 and enter any financial dimension values as needed.
- Enter the parties information (Customer and Vendor accounts) and enter a start date when netting should begin.
- Activate the netting agreement.
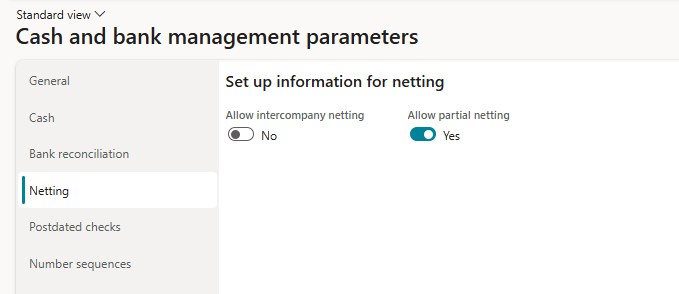
In Version 10.0.43, the Netting function is enhanced by introducing the the “Allow partial netting” parameter on the Cash and bank management parameter. “Allow partial netting” can only be adjusted if there is only 1 customer invoice and 1 vendor invoice selected for netting.
To Create Manual Netting:
- Navigate to Cash and bank management > Netting > Customer and vendor balances netting.
- This page will show all the active pairs of customer and vendor accounts that are available for netting.
- Select a record and click “Create netting”.
- User may manually select the Open customer invoices and Open vendor invoices for netting, and click “Mark selected” on each section.
- If only 1 customer invoice and 1 vendor invoice are selected, then user may adjust the Netting amount to partial netting as needed.
- When done with selection, enter the Netting posting date.
- If Netting advice should be printed, select “Yes” on Print netting advice.
- Click “Post” to post the netting.

After the netting is posted, a message will show saying that “Number of vouchers posted to the journal: 2” – One voucher for the vendor transaction and one voucher for the customer transaction.

Unfortunately as of publishing this article in Apr 2025, there is no direct way of reviewing the vouchers posted from the netting page. User may either query it from Voucher transactions or through the Customer/Vendor transactions page.


To Create Automatic Netting:
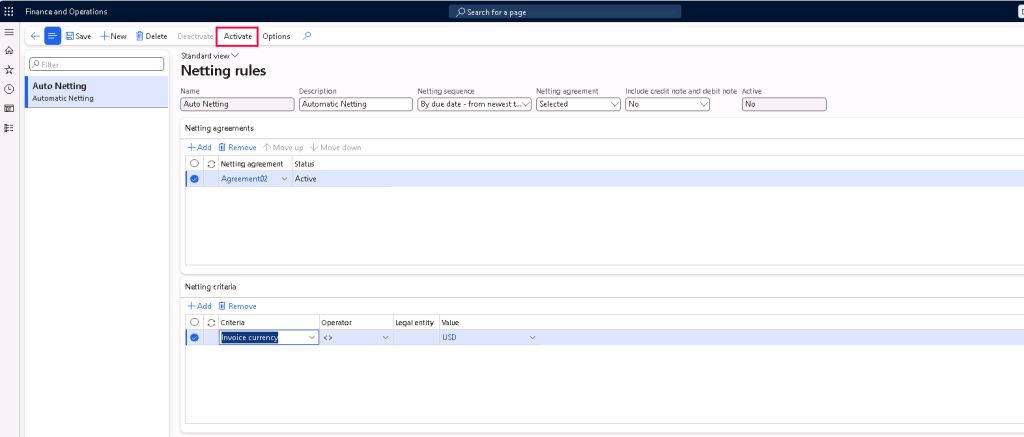
- Setup Netting Rule (Cash and bank management > Netting > Netting rule)
- Create a netting rule
- Select the Netting sequence if it should be by due date or invoice balance
- Select the Netting agreement that should be included in automatic netting. Either “All” active netting agreements or “Selected” netting agreements which user could select the netting agreements on the Netting agreements tab below.
- User can also select if it should Include credit note and debit note.
- User can further define the Netting criteria if it should only automatically net for specific vendors, customers, or currency.
- Activate the netting rule.
- Automatic Netting can be ran in 5 different ways.
- Cash and bank management > Netting > Automatic netting
- Cash and bank management > Netting > Customer and vendor balance netting, select Automatic netting
- Accounts receivable > Periodic tasks > Automatic netting
- Accounts payable > Periodic tasks > Automatic netting
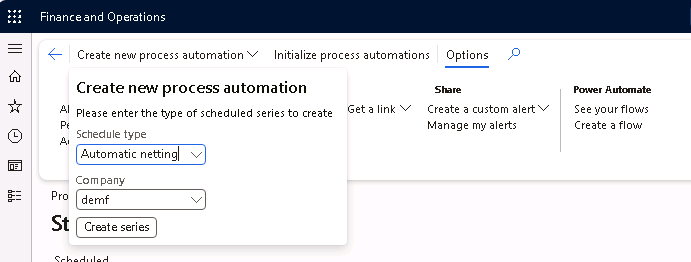
- Cash and bank management > Netting > Process automations
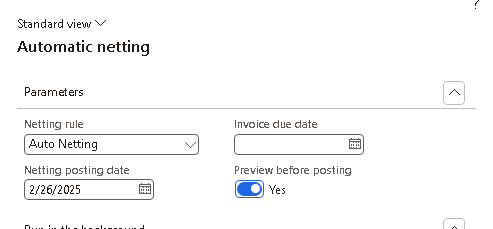
Option a to d are one-time automatic netting that allows you to select the netting rule, netting posting date, invoice due date cut off, and if you would like to preview before posting.
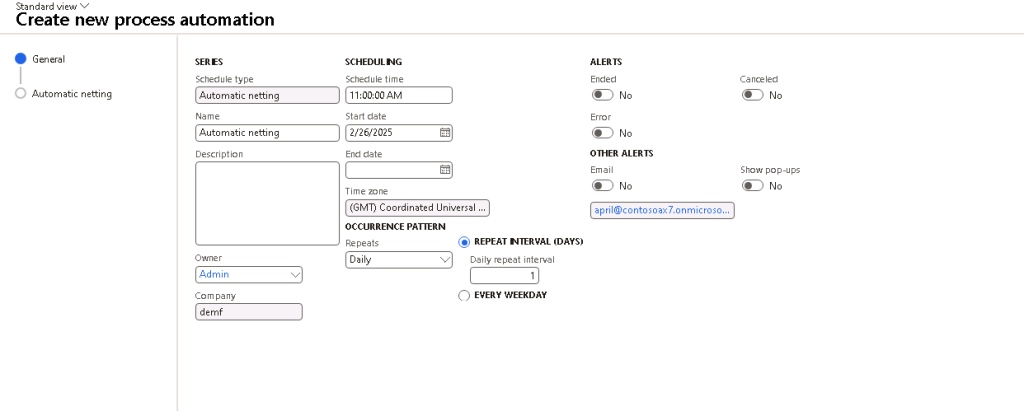
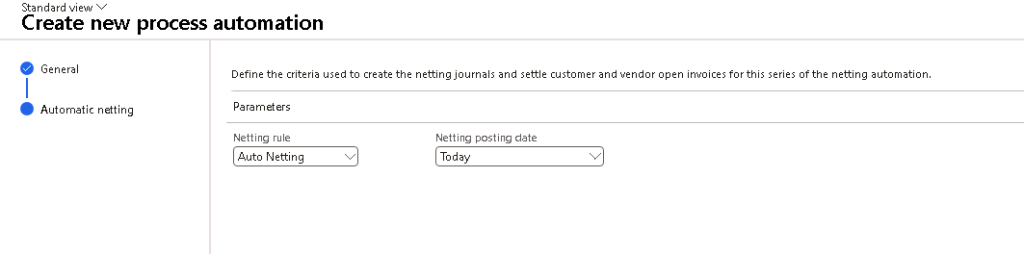
Option e is a to setup a recurring job for running automatic netting.

View Netting History
To view netting history for the netting agreement, user may navigate to Cash and bank management > Netting > Customer and vendor balances netting, click on “Netting history” on the ribbon.
If the netting was done incorrectly or needs to be canceled for any reason, user may select “Reverse netting” on the Customer and vendor balance netting history page and define the reversal date.
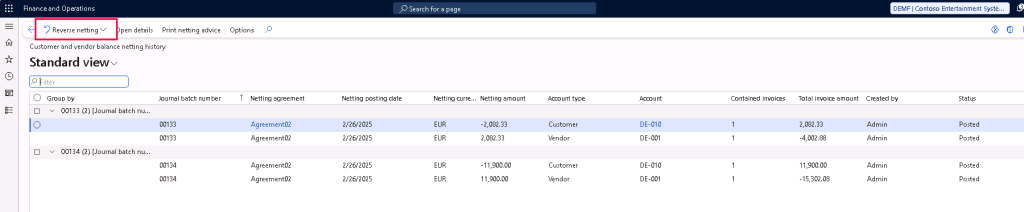
User may also reprint any netting advice as needed via the netting history page by click on “Print netting advice“.
End Netting Relationship
If the netting relationship needs to be terminated, user may update the “To date” on the netting agreement’s parties record (Cash and bank management > Netting > Netting agreement).
To update the netting agreement, the netting agreement needs to be deactivated first by clicking on “Deactivate”. Then, reactivate the netting agreement when it’s updated.
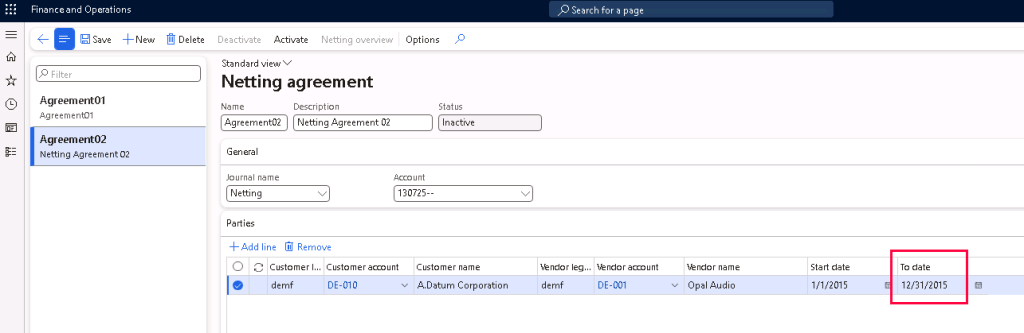
Note that if the “To date” is before today’s date, the Netting overview will drop this record and the Netting histories will no longer be available to be viewed anymore.
However, there is 2 workaround if the Netting history needs to be viewed for the terminated relationships.
- Remove the netting agreement “To date” temporarily and view the Netting overview and history.
However, this is not recommended in case user forgets to update the “To date” after viewing the history and the automatic netting happens. - Launch the netting history page directly with the string “&f=custvendnettinghistory” replacing the “&mi=xxx” part of the D365 Finance url.
For example:
Update https://usnconeboxax1aos.cloud.onebox.dynamics.com/?cmp=demf&mi=DefaultDashboard
To https://usnconeboxax1aos.cloud.onebox.dynamics.com/?cmp=demf&f=custvendnettinghistory
Do note that this custvendnettinghistory page does not have any permissions assigned to it and only System Administrator can access the page so users might have to work with developers to create the appropriate privileges/duties for other roles to access this page.
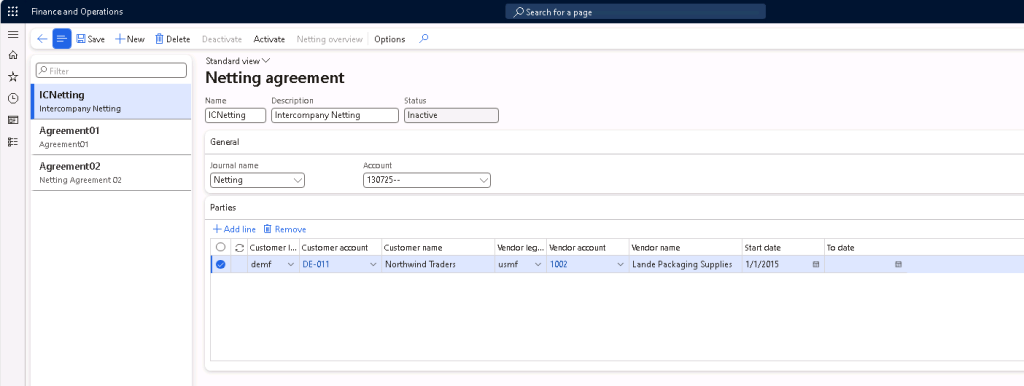
Intercompany Netting
- Navigate to Cash and bank management > Setup > Cash and bank management parameters.
- On the Netting tab, select “Yes” for Allow intercompany netting.

- Create a new netting agreement (Cash and bank management > Netting > Netting agreement).
- Enter the details and under Parties, select the customer and vendor from each legal entity, then activate the netting agreement.
Note that either the customer or the vendor legal entity must be the same as where the netting agreement is being created.
- Under the netting overview, it will show separate lines for each currency transactions.

- Once the Netting is posted, it will post 3 vouchers – two vouchers in the legal entity where the netting agreement was created and one voucher in the other legal entity.
Essentially the two vouchers in the legal entity where the netting agreement was created is to offset the netting main account and post it to the Intercompany Receivables /Payable account so that it will balance with the offset legal entities’ Intercompany Payable / Receivables account.


Leave a comment